

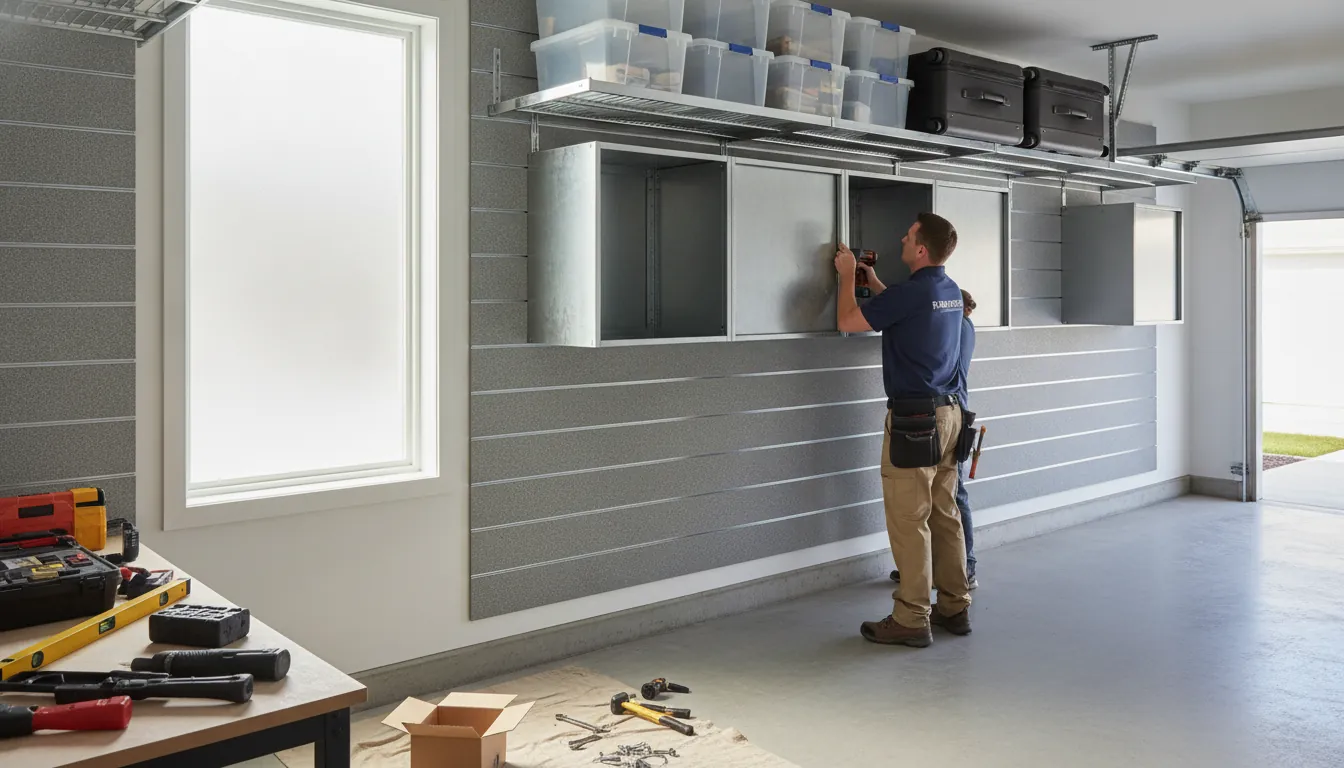
If you are searching for garage storage installation same day, you probably want two answers: how much of the work can be finished in one visit, and what will happen while the installers are in your garage. A focused storage project can often be completed in a day, but the exact schedule depends on the layout, the number of components, wall and ceiling conditions, and whether flooring or other services are part of the plan. Here is what a professional installation day typically looks like from preparation through the final walkthrough.
Schedule a free in-home consultation with Garage Kings.
How Long Does Garage Storage Installation Actually Take?
The installation itself is usually the shortest part of the project. Before the crew arrives, the layout has to be designed, measurements confirmed, and the right cabinets, rails, slatwall components, racks, and accessories prepared. That planning is what makes a one-day transformation possible.
Many cabinet and storage installations are completed in one day. A smaller cabinet wall or a defined combination of cabinets and wall storage may fit comfortably into one workday. A larger garage with several cabinet runs, multiple overhead racks, extensive accessories, unusual access, or wall repairs can require additional time. A floor coating may also change the sequence because the coating needs time to set before storage components are placed over or around it.
During the consultation, ask for the expected installation window for your actual design rather than relying on a generic promise. The useful questions are:
- Which parts of the system will be installed on the scheduled day?
- Does the plan include cabinets, a workstation, slatwall, overhead storage, or all four?
- Are there wall, ceiling, electrical, plumbing, or garage-door clearances to account for?
- Will a floor coating or another service be completed before the storage work?
- What needs to be cleared or moved before the crew arrives?
Garage Kings designs storage around how you use the space, whether that means tools at arm’s reach, sports equipment off the floor, seasonal items overhead, or a dedicated work area. You can review the broader garage storage solutions guide to see how cabinets, overhead racks, and organization fit together. This article focuses on the installation-day experience, not on choosing between every possible storage type.
What You Need to Do Before the Installer Arrives
A little preparation helps the crew spend the day installing instead of sorting through belongings. It also gives you a chance to catch layout issues before materials are on the wall.
Clear The Installation Zone
Remove loose items from the walls, floor, and ceiling area where the system will go. Create a clear path from the garage entrance to the installation area so materials and tools can be brought in safely. If vehicles, lawn equipment, or boxes must remain in the garage, identify what cannot move and tell the installer before the design is finalized.
You do not necessarily need to empty every corner of the garage. The important step is to clear the surfaces and access routes that are part of the plan. Mark items that must stay, items that can be relocated, and items you no longer need. That distinction makes it easier to place storage where it will solve a real problem.
Confirm What Belongs Within Easy Reach
Make a short list of the items you use most often. Hand tools, batteries, cleaning supplies, sports gear, and automotive items should not all be treated the same way. Reserve accessible cabinet drawers, hooks, shelves, and work surfaces for frequent-use items. Less frequently used seasonal items can go higher or farther back, provided they remain safe and practical to retrieve.
Also note the equipment that needs space around it. Lawn mowers, bicycles, trash bins, freezers, water heaters, and vehicles all affect the final layout. A good installation is not simply a set of boxes on a wall. It should leave room to open doors, walk through the garage, service equipment, and use the vehicles as intended.
Share Site Details In Advance
Tell the project team about low ceilings, exposed framing, finished drywall, previous shelving, uneven surfaces, outlets, pipes, vents, windows, and the garage door track. These details help the installer confirm where components can be secured and where clearances must be preserved. Do not cover or disconnect utilities yourself unless the appropriate professional has instructed you to do so.
Confirm the arrival window, where the crew can park, and how the team should enter the property. Secure pets and make arrangements for children to stay out of the work zone. If the garage is attached to the home, consider how noise and dust may affect nearby rooms. The team can explain the protection and cleanup steps planned for your project.
Talk through your layout and installation timeline with Garage Kings.
The Installation Sequence: Anchors, Rails, And Final Assembly
Professional storage installation is a sequence, not a single act of hanging cabinets. The order matters because each step affects alignment, access, and the fit of the components that follow.
1. Protect The Work Area And Confirm The Plan
After the crew arrives, the team reviews the work area, brings in the planned materials, and confirms the layout. This is the right time to raise a last-minute concern, such as a vehicle clearance, a preferred accessory location, or an item that must remain accessible. If the final site differs from the original measurements, the installer should address that before drilling or fastening.
2. Check Walls, Ceiling Conditions, And Clearance
The installer checks the surfaces and the locations where the system will be secured. Wall-mounted components need suitable support, and overhead storage needs a secure attachment plan that accounts for the structure above it. The team also checks the opening and operating path of the garage door, light fixtures, windows, vents, and other fixed features.
This is one reason a professional assessment matters. A product may fit on paper but still be a poor choice if it blocks a door, crowds a vehicle, conflicts with a track, or is attached to a surface that cannot support the intended use. The installation plan should adapt to the garage rather than forcing the garage to adapt to a catalog layout.
3. Install Rails, Backers, Or Wall Organization Components
Depending on the design, the crew may begin with rails, backers, or a slatwall organization system. These components establish a level, consistent base for cabinets, hooks, shelves, and other accessories. Careful measuring and leveling at this stage helps the finished system look intentional and keeps doors, drawers, and accessories operating properly.
Slatwall is useful when your storage needs may change over time. Hooks, holders, baskets, and racks can be arranged around the items you own today, then adjusted as your routine changes. The goal is to make the vertical wall space work harder without turning frequently used equipment into an obstacle course.
4. Assemble And Secure Cabinets And Workstations
Once the supporting components are ready, the team assembles and positions the cabinet runs, workstations, and other floor or wall-based pieces. Installers check the relationship between each unit, the finished wall, the floor, and nearby doors. They make adjustments for a clean line and practical access rather than simply setting each piece in the nearest open space.
Cabinet placement should reflect the job each area needs to perform. A workstation benefits from clear standing room and nearby tool storage. A cabinet for household overflow may belong outside the main vehicle path. Closed cabinets can keep clutter out of sight, while open shelves and hooks can make daily-use items easier to grab.
5. Add Overhead Storage And Accessories
Overhead racks and accessories are installed after the main layout is established, with attention to the ceiling, garage-door operation, and safe access. Follow the manufacturer’s guidance for loading and use. Store suitable seasonal or infrequently used items overhead, and keep heavy or frequently handled items where they can be reached without awkward lifting.
The final accessories may include hooks, baskets, shelves, holders, drawer inserts, or specialty organizers. These details are where a general storage system becomes a working system for your household. Place accessories according to the list you made before installation, then test the locations with the actual items whenever possible.
6. Adjust, Clean, And Walk Through The Finished System
Before the crew leaves, doors and drawers should open cleanly, accessories should be positioned as planned, and the garage should be left in an orderly condition. Walk through the system with the installer. Ask how to load the components, how to reposition adjustable accessories, and what to do if a door or drawer needs a future adjustment.
Take a moment to stand where you will park and walk the routes you use most. Check that vehicles, people, bikes, bins, and equipment still have the clearance they need. A final walkthrough is not just a visual inspection. It is a practical test of whether the new storage makes the garage easier to use.
Combining Storage And Floor Coating In A Single Visit
Many homeowners plan storage and flooring together because the two improvements support the same goal: a garage that is easier to clean, organize, and enjoy. The services can be coordinated as one transformation, but they are not automatically completed at the same time or in the same order.
In many projects, the floor work is scheduled before storage so the finished surface is protected from later drilling, assembly, and moving materials. The floor system and project conditions determine when it is ready for the next phase. Weather, ventilation, surface preparation, product requirements, and the size of the storage layout can all affect scheduling.
During your consultation, ask the team to map the complete sequence. Confirm whether storage must be removed first, when the floor can be walked on, when cabinets and racks can be placed, and whether a separate return visit is needed. This makes the one-day expectation more useful because you are planning around the full project rather than only the time the installers spend assembling cabinets.
If you are considering both services, review Garage Kings storage solutions and the garage floor coating service before your appointment. The design team can help coordinate the layout, clearances, and finish choices so the storage and floor work as one space.
After Installation: Care Tips For Your New System
A new storage system should reduce daily friction, but it still benefits from sensible use. Start by placing items in their assigned locations instead of filling every open surface at once. Give frequently used tools and supplies the easiest access, and keep a small amount of open capacity for future needs.
- Follow the care and loading instructions provided for each cabinet, rack, shelf, hook, and accessory.
- Keep heavy items in locations designed for them, and do not exceed the manufacturer’s stated limits.
- Use appropriate cleaners for the cabinet finish and avoid abrasive products unless the manufacturer approves them.
- Keep water, leaking containers, and corrosive materials from sitting on or inside storage components.
- Periodically look for loose hardware, shifted accessories, damaged doors, or changes caused by impact.
- Ask the installer about adjustments instead of modifying structural attachments yourself.
Organization is easier to maintain when every category has a home. Keep a small amount of space beside the vehicle path, label bins if several family members use the garage, and place seasonal items together. If the system includes movable accessories, review the layout after a few weeks and move the pieces that do not match your real routine.
For ideas about planning the overall layout, see how to choose the best garage storage system. For homeowners who want to keep more equipment behind closed doors, Garage Kings garage cabinets can be part of a broader storage plan.
Plan your garage storage installation with a free Garage Kings consultation.
Frequently Asked Questions
Can Garage Storage Really Be Installed In One Day?
Often, yes. Many focused cabinet and storage installations are completed in one day. The actual schedule depends on the number and type of components, the garage layout, access, surface conditions, and whether other services are being coordinated. Ask for a project-specific installation window during the consultation.
What Should I Move Before The Installation?
Move loose items from the walls, floor, and ceiling areas included in the plan, and clear a path for materials and tools. You do not always need to empty the entire garage. Items you are keeping, immovable equipment, vehicles, utilities, and clearance requirements should be discussed with the installer before the layout is finalized.
Are Cabinets And Overhead Racks Secured During Installation?
A professional installation includes a plan for positioning and securing the system to suitable surfaces. The attachment method depends on the component, the construction of the garage, and the manufacturer’s requirements. The installer should confirm those conditions before work begins and explain safe loading after the walkthrough.
Can Garage Flooring And Storage Be Planned Together?
Yes. Coordinating both services can help create a more complete transformation, but the schedule and order depend on the floor system, cure requirements, storage design, and site conditions. Ask the team to document which work happens first and when each area can be used.
How Do I Start A Garage Storage Installation Project?
Start with a free in-home consultation. The team can review how you use the garage, measure the available space, identify obstacles, and discuss a layout for cabinets, overhead storage, slatwall, workstations, and accessories. That conversation gives you a more accurate installation plan than choosing components without seeing the space.
Plan your one-day garage transformation with a free Garage Kings consultation.