
Learning how to program a garage door opener usually means pairing a remote, wireless keypad, or vehicle button with the opener. The exact button sequence varies by brand and model, so start with the instructions for your equipment rather than relying on a universal code. A careful setup can save time and help you avoid changing settings you did not mean to change.
Contact Garage Kings to discuss your garage door
What Do You Need Before Programming An Opener?
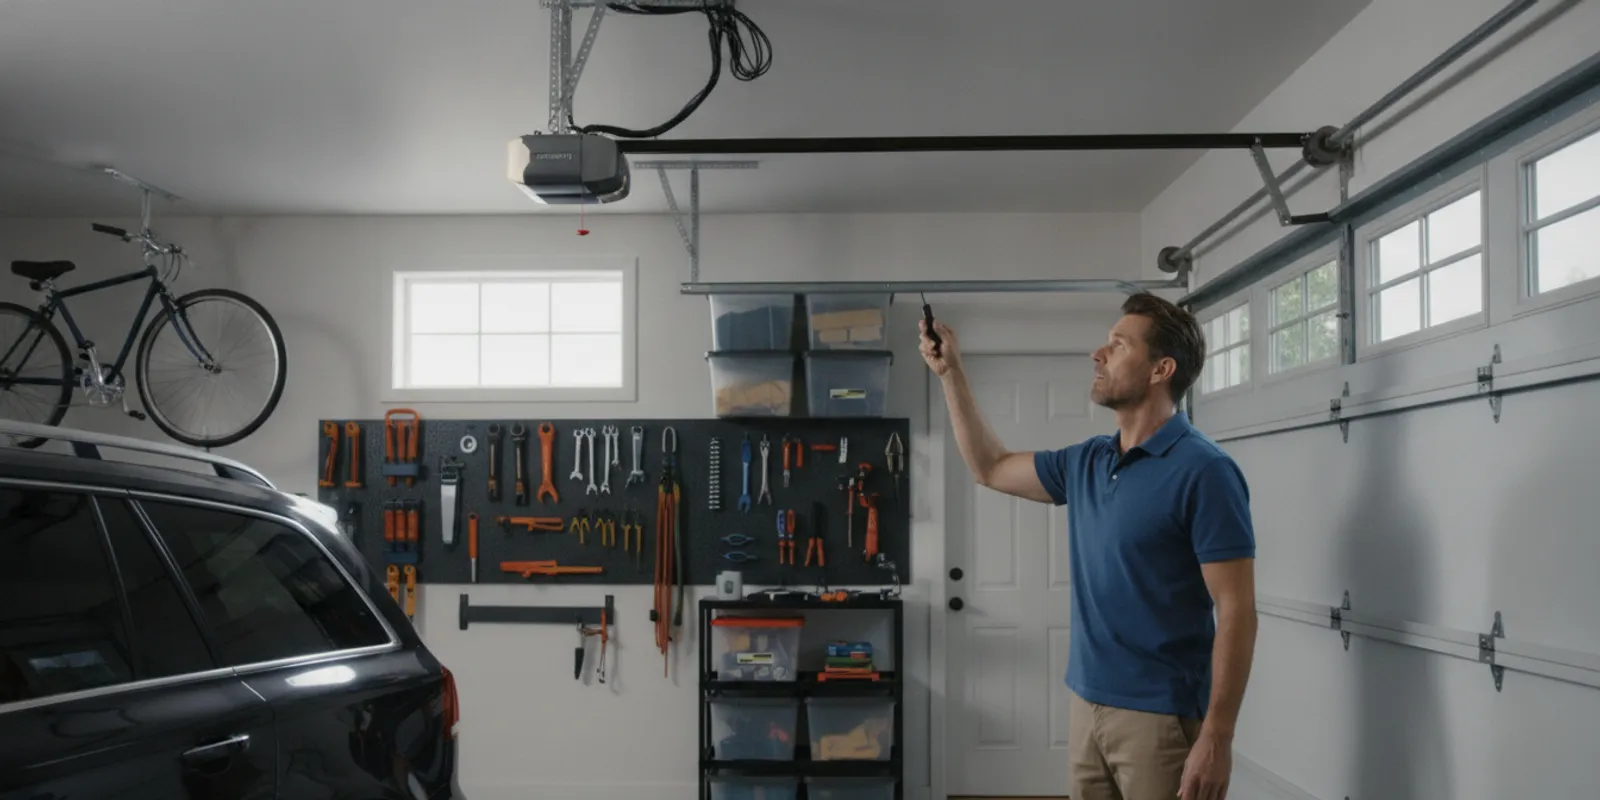
Take a few minutes to identify the equipment and make the work area safe. Most programming involves a remote transmitter and the opener’s receiver, which is commonly built into the motor unit mounted overhead. A keypad or vehicle control may use a different sequence, even when it operates the same door.
- Find the opener model information. Look for a label on the motor unit. Note the manufacturer and model number, and use the matching owner’s manual or official support instructions.
- Check the transmitter. Confirm it is intended for your opener and that its battery is installed correctly. A remote that looks similar may not be compatible.
- Make room around the door. Park vehicles clear of the opening. Keep children, pets, and other people away from the moving door and its path.
- Use a stable way to reach the controls. If the learn button is out of comfortable reach, do not climb on a vehicle or improvise a platform. Ask another adult for assistance or call a technician.
- Keep the manual nearby. The opener’s indicator lights, button names, and timing windows differ. Follow the exact procedure for your unit.
Before starting, check that the door is closed and that nothing is beneath it. Do not loosen brackets, remove covers beyond what the instructions require, or adjust springs and cables. Those parts can be under substantial tension. If you are also planning a broader door project, Garage Kings’ garage door services page explains the service category, while its garage doors buyer’s guide covers selection considerations.
It helps to distinguish a remote-control problem from a door problem before you begin. If the opener works from the wall control and the door travels smoothly, the issue may be limited to a remote, keypad, or vehicle connection. If the wall control also fails, or the door moves abnormally, pairing another transmitter is unlikely to solve the underlying issue. Note what works and what does not; that simple record can make the next troubleshooting step clearer. Check that you can see the entire door while testing, and stop if anything enters its path.
Before following a sequence, match the instructions to the exact opener and control in front of you. A model number on the motor unit is more useful than the door’s appearance, because similar-looking openers can use different receivers. If you no longer have the paper manual, use the manufacturer’s official support source and check that its model designation matches your label. Write down the opener model, remote model, and any indicator pattern you see. Keeping those details together helps prevent repeating a procedure intended for different equipment.
Also decide which control you are adding and whether the goal is to add or replace a transmitter. Adding one device is not necessarily the same as resetting the receiver. If instructions include a long press, memory clear, or factory reset, pause to learn what it changes before proceeding. A reset may remove controls already in use and create extra setup work for every household member.
How Do You Program A Handheld Garage Door Remote?
The process below describes the common pairing pattern, not a guarantee that every opener uses the same steps. Your owner’s manual takes precedence. Some units use a clearly marked “Learn” button; others use a different label or menu.
- Locate the receiver’s programming control. With the door closed, identify the motor unit and find the learn or program button. The button may be under a light cover or on the side of the unit. Do not remove parts unless the manual says to.
- Read the indicator instructions first. Check what the light or display should do when programming mode begins, and note how long the mode stays active. Some systems use a short window.
- Activate programming mode as directed. Press or hold the control only for the time specified by the manufacturer. On some openers, holding it too long can erase stored transmitters or change another setting.
- Send the remote’s signal. Within the stated time, press the button on the remote that you want to use. Depending on the equipment, you may need to press it once or more than once. Watch for the confirmation light or sound described in the manual.
- Test from a safe position. Stand clear of the door and press the newly programmed button. Confirm that the door responds as expected, then test the wall control separately.
If the opener has multiple buttons or channels, program one remote button at a time and label the function if needed. Avoid repeatedly pressing buttons without checking the manual; each press may affect the programming sequence. If your opener uses rolling codes or another security feature, the precise steps may differ from a fixed-code system.
For model-specific guidance, consult the instructions supplied with the opener or the manufacturer’s official support materials. Do not assume that an online sequence for a different model is safe to use. Garage Kings’ garage door service guide can also help you decide whether your concern is a simple control setup or part of a larger door issue.
How Do You Program A Wireless Keypad?
Keypads usually need to be paired to the opener and then assigned a personal identification number, or PIN. The exact sequence can depend on whether the keypad is new, being reprogrammed, or compatible with more than one opener. Use the keypad and opener manuals together.
- Check compatibility. Confirm that the keypad supports the opener’s model and radio system. A keypad designed for one generation may not pair with another.
- Choose a PIN privately. Avoid an easy-to-guess sequence such as a simple repeated number. Do not share the PIN more broadly than necessary.
- Enter programming mode. Follow the keypad’s stated sequence, then activate the opener’s learn control if the manual calls for it. The order matters and can vary by product.
- Complete the pairing within the time limit. Enter the PIN and press the required confirmation key or button, following the manufacturer’s steps.
- Test the keypad with the door in view. Enter the PIN and confirm that the door moves only when intended. Close the cover and keep the PIN private.
If you are replacing a keypad, check whether the manufacturer recommends removing the old code or resetting the keypad first. A reset procedure can affect stored settings. Be especially careful with instructions that mention clearing the opener’s memory, because that may require pairing remotes and other controls again.
For an outdoor keypad, check the manufacturer’s guidance on battery replacement and weather exposure if it does not respond consistently. Enter the PIN at a normal pace and look for the keypad’s confirmation signal before concluding that pairing failed. If the keypad appears to accept the code but the door does not move, determine whether the opener responds to another control. This separates a keypad-specific issue from a problem with the opener or door. Keep the PIN out of view while entering it, and avoid leaving a written copy beside the keypad.
Can You Program A Vehicle’s Built-In Garage Door Button?
Many vehicles have a built-in control system that can be paired with a compatible garage door opener. The setup often has two stages: first teaching the vehicle button from a handheld remote, then synchronizing it with the opener’s receiver. Some vehicles or openers use a different method, so check both manuals.
- Park outside the door’s path with the vehicle in a safe position. Keep the garage door area clear.
- Follow the vehicle manual to clear or select the correct built-in button, if necessary.
- Hold the handheld remote and vehicle button in the positions specified by the vehicle maker. Indicator lights may change as pairing proceeds.
- If the opener uses rolling-code technology, complete the additional receiver synchronization step described in the manuals.
- Test the vehicle control while you can see the door. Confirm that the intended button operates the correct opener.
Do not treat a vehicle’s pairing instructions as interchangeable with a handheld remote procedure. The vehicle may require a specific ignition state, button timing, or second-stage setup. If the instructions call for a helper, keep that person outside the door’s travel area and communicate before testing.
If your vehicle has several programmable buttons, confirm which one you are setting before clearing or overwriting anything. A practical check is to label the intended door in your notes, complete setup for one button, and test it before moving to another. In a home with more than one opener, test each pairing separately while watching the corresponding door. This makes it easier to spot a button assigned to the wrong receiver. If the vehicle system will not pair directly, do not keep repeating the handheld-remote method; consult the vehicle and opener instructions for any compatibility limitation or alternate process.
What Should You Do If Programming Does Not Work?
A failed pairing does not automatically mean that the opener is broken. Work through basic checks in order, changing one thing at a time so you can tell what helped.
| What you notice | What to check | Reasonable next step |
|---|---|---|
| The remote does not light up or respond | Battery orientation, battery condition, and the remote’s instructions | Replace the battery if needed, then retry the model-specific pairing process |
| The remote works only from very close by | Battery, transmitter compatibility, and possible interference | Try from the normal operating position and consult the opener manual |
| The opener does not confirm pairing | Whether programming mode was activated and the stated time window was met | Restart the sequence carefully; avoid holding buttons longer than directed |
| The wall control works but a remote does not | Remote compatibility, battery, and stored transmitter setup | Pair a compatible transmitter using the exact instructions for the opener |
| The door starts to move but reverses or behaves irregularly | Whether the path is clear and whether the safety sensors appear obstructed | Stop repeated tests and use the owner’s manual or arrange professional service |
Also check whether the opener has power and whether a lock or vacation feature has been activated. These controls can affect remote operation on some models. If another remote already works, compare its behavior, but do not assume that every transmitter can be copied or added in the same way.
A useful troubleshooting order is to start with the simplest checks: confirm the remote battery and its orientation, verify that the wall control operates normally, and check compatibility against the opener model. Then reread the exact programming instructions and note the expected light or sound. Retry once while following the timing carefully. If the indicator does not match the manual or the control still will not pair, stop rather than trying a series of unrelated button combinations. Changing one condition at a time gives you a clearer answer than repeatedly resetting the system.
Keep a brief record of the checks you completed, the model numbers, and the outcome of each test. For example, note whether the wall control worked, whether the remote indicator lit, and whether the opener gave a pairing confirmation. If you need assistance, these observations give a technician a more useful starting point. They also help distinguish a dead remote battery from a receiver setup problem without relying on guesswork.
Do not bypass safety sensors, defeat the opener’s safety features, or keep testing a door that binds, drops, makes unusual noises, or reverses unexpectedly. Programming a remote will not correct a mechanical or safety problem. For troubleshooting beyond simple transmitter pairing, Garage Kings has a homeowner-focused guide to common garage door problems, as well as information on garage door installation and repair.
How Can You Keep Opener Access Secure?
A remote or keypad is a key to an entry point, so treat it with care. Keep handheld transmitters out of view in a parked vehicle when practical, and do not post a keypad PIN where visitors can see it. If a remote is lost, stolen, or no longer needed, consult the opener manual about removing that transmitter from memory. A full memory erase may remove all stored remotes, keypads, and vehicle connections, so understand the consequences before proceeding.
When you move into a home or take responsibility for a property, check the opener instructions to learn whether access codes and transmitters can be cleared and re-enrolled. The steps depend on the model. Do not rely on a reset sequence from an unrelated opener, and verify that each authorized control works after any reset.
After a lost remote or a change in who should have access, consider which devices and people still need to operate the door. Use the manufacturer’s individual-device removal procedure if the opener supports it. If the only available option is to clear all stored devices, plan to re-enroll the remotes, keypad, and vehicle controls that remain authorized. Test each one after the change, then store spare transmitters securely and share the new keypad code only with people who need it.
Automatic residential door operators are subject to safety requirements. The federal safety standard for automatic residential garage door operators describes requirements for covered operators. The Consumer Product Safety Commission has also described entrapment protection requirements for openers manufactured for sale in the United States from 1991 onward in its garage door opener safety announcement. These references are not a substitute for your model’s instructions or an inspection of a malfunctioning door. Keep the door’s safety features in service and do not let children play with transmitters or controls.
Contact Garage Kings about your garage door project
Frequently Asked Questions
Can I program a garage door remote without the original remote?
Often, yes, if the replacement remote is compatible and you can access the opener’s receiver. Follow the opener and remote manuals. Some vehicle systems use a handheld remote during setup, so check the vehicle instructions before starting.
Will programming a new remote erase the old ones?
Not necessarily. Adding a transmitter and clearing the opener’s memory are different actions on many models, but the controls and steps vary. Read what the button does before holding or pressing it. A memory reset may require you to pair every remote and keypad again.
Why does my opener light flash but the remote still does not work?
A flashing light can mean different things on different models. Check the manual’s explanation for the exact light pattern, then verify the remote battery, compatibility, and pairing sequence. If the door itself moves unevenly or reverses, stop and seek help rather than repeatedly testing it.
How many remotes can one opener pair?
The limit depends on the opener model and the types of devices stored in its memory. Check the owner’s manual for capacity and for the process to remove an individual device. Do not assume all models have the same limit.
When Should You Ask For Professional Help?
Basic pairing is a reasonable homeowner task when the instructions are clear and the opener and door behave normally. Stop and contact a qualified professional if the programming control is inaccessible, the manual is missing and the sequence is unclear, the opener will not respond consistently, or the door shows signs of a mechanical or safety issue. The safest next step is to identify the opener model, describe what you have already tried, and avoid adjusting springs, cables, or other door hardware yourself.