
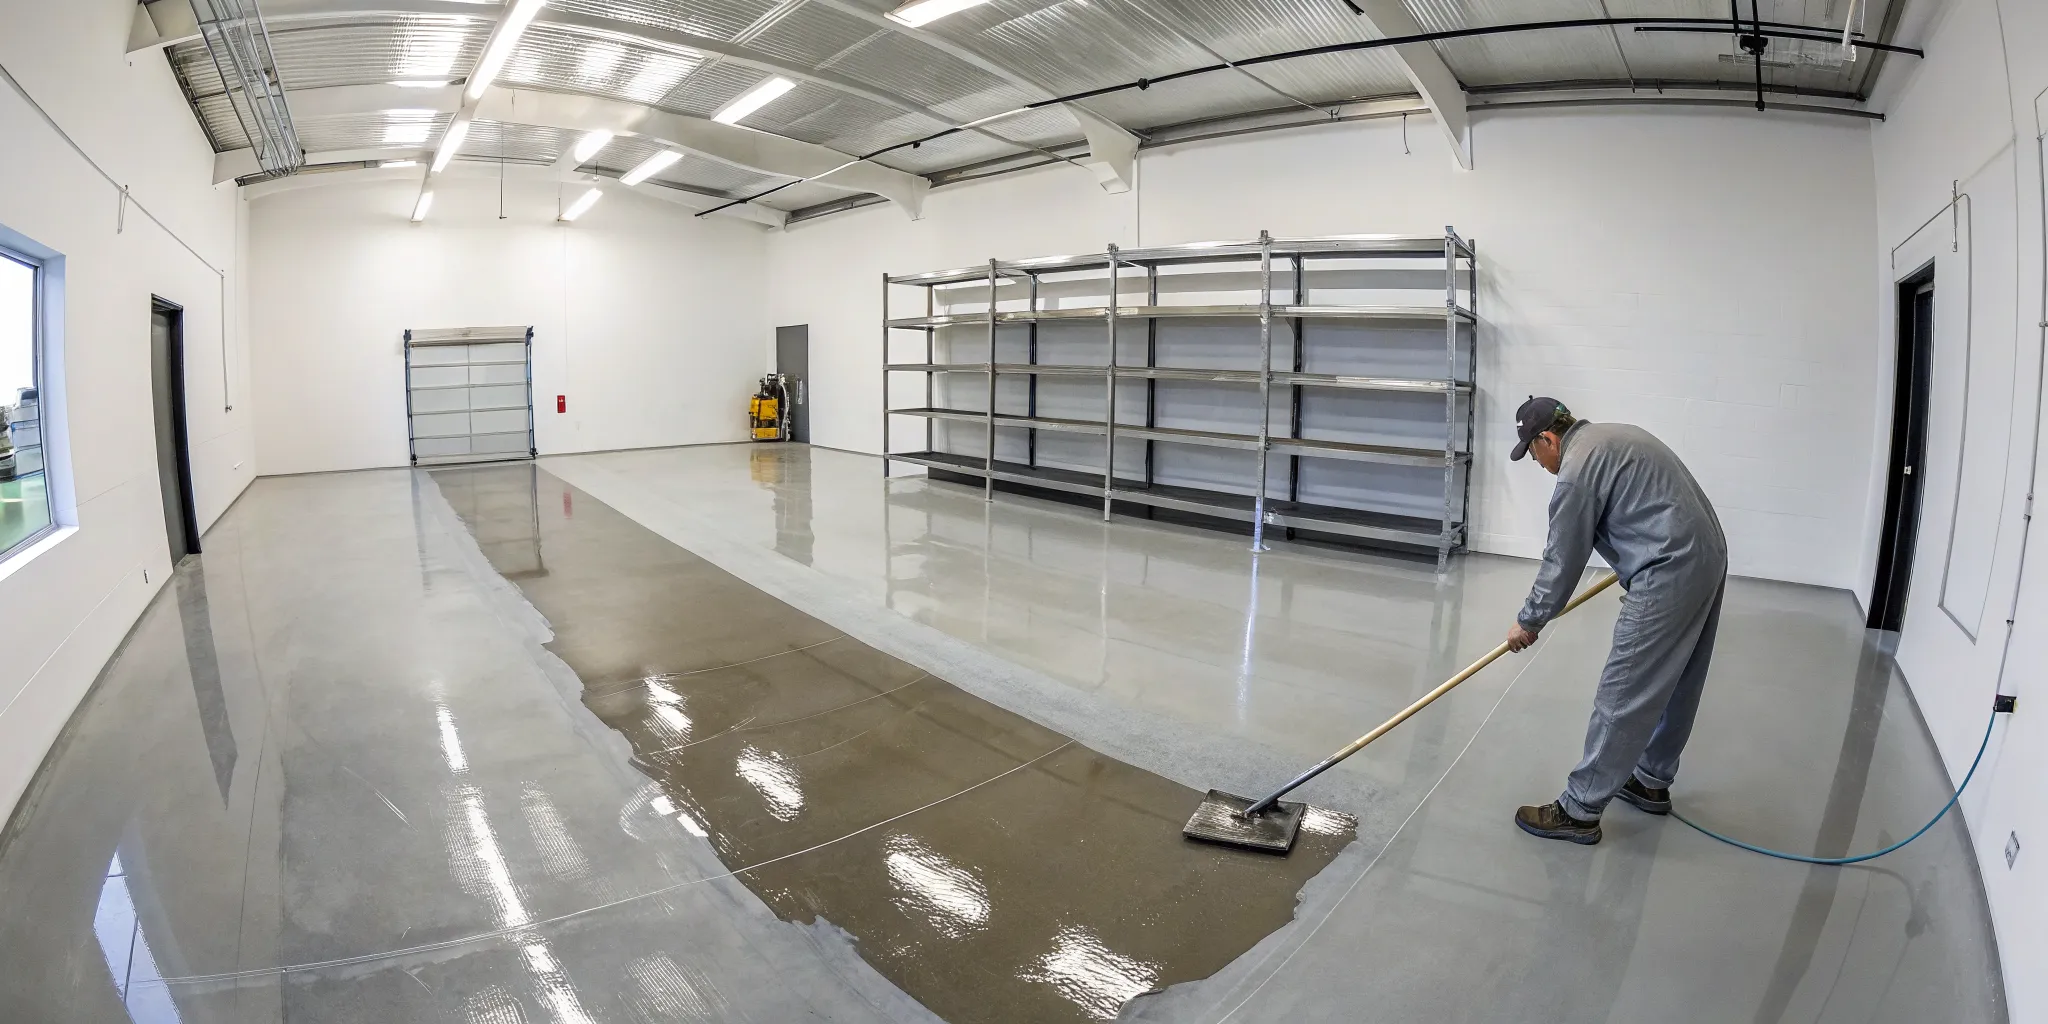
You’ve probably seen those stunning, seamless garage floors that look like they belong in a high-end showroom. More than likely, you were looking at an epoxy floor. But what is it, exactly? It’s much more than just a layer of paint. An epoxy coating is a two-part chemical system that cures into a hard, plastic-like surface, creating a powerful bond with the concrete below. This process results in a floor that is incredibly durable, resistant to stains, and easy to maintain. Here, we’ll break down how it works, the different styles you can choose from, and its pros and cons.
Key Takeaways
- Proper Prep Is Everything: The success of your floor coating depends entirely on surface preparation. Your concrete must be cleaned, repaired, and profiled correctly to create a strong, permanent bond and prevent peeling.
- DIY Kits Are a Gamble: While tempting, DIY epoxy projects often fail due to lower-quality materials, improper mixing, or unaddressed moisture issues. These mistakes can lead to a finish that doesn’t last, wasting your time and money.
- A Professional Polyaspartic Floor Is a Lasting Investment: Professionals use superior polyaspartic coatings that are more durable, flexible, and UV-resistant than standard epoxy. Hiring an expert ensures a flawless, long-term solution that adds real value to your home.
What Is Epoxy Flooring?
If you’ve ever seen a glossy, seamless garage floor that looks almost too perfect to park on, you were likely looking at an epoxy coating. At its core, an epoxy floor is a tough, resin-based coating that’s applied directly over concrete. Think of it as a protective shield for your floor. It creates a smooth, non-porous surface that’s a breeze to clean because it’s completely sealed off from dust, dirt, and spills. This is why it’s such a popular choice for garages, basements, and even commercial spaces where cleanliness and durability are key.
An epoxy coating provides a durable surface that stands up to a lot of abuse, from chemical spills to hot tires, without peeling or staining. While you can find DIY epoxy kits at most hardware stores, the quality and longevity can vary quite a bit. A professional installation ensures the concrete is properly prepared and the coating is applied correctly for a finish that lasts for years, not just a season. Understanding the basics of epoxy is a great first step before exploring all the different concrete coating options available for your home. It’s a foundational choice that has paved the way for even more advanced and reliable solutions.
How Epoxy Coatings Work
The magic of epoxy flooring lies in its chemistry. It’s not paint; it’s a two-part system consisting of a resin and a hardener. When these two components are mixed, they trigger a chemical reaction that causes them to cure and harden. This process creates an incredibly strong plastic-like material that forms a powerful bond with the concrete beneath it.
This chemical bond is what gives epoxy its renowned durability. The resulting surface is exceptionally tough and resistant to abrasions, impacts, and general wear and tear from daily life. It’s a big reason why epoxy is trusted in high-traffic residential areas and demanding industrial settings. That seamless, hardened surface can handle dropped tools, spilled oil, and heavy foot traffic far better than bare concrete ever could.
Epoxy vs. Polyaspartic Coatings
While epoxy is a well-known name, it’s not the only player in the game. Polyaspartic coatings are a newer, more advanced type of floor coating that offers some significant advantages. Think of polyaspartic as the next generation of concrete protection. While chemically similar to epoxy, polyaspartic coatings cure much faster, sometimes in a matter of hours instead of days. This means you can get back to using your garage sooner.
Polyaspartic coatings are also more flexible and can be applied in a wider range of temperatures, from hot summer days to cooler winter afternoons. One of their biggest benefits is their UV resistance, which means they won’t turn yellow or fade when exposed to sunlight, making them perfect for patios or garages with lots of natural light. These features are why professionals often prefer polyaspartic for high-quality garage floors that need to look great and last for years.
Exploring Epoxy Floor Styles
One of the best parts about choosing an epoxy floor is the sheer variety of designs available. This isn’t a one-size-fits-all solution. The final look of your floor comes down to the pigments, additives, and application techniques used, giving you the power to create a surface that’s truly your own. From sleek, solid colors to dynamic, multi-toned designs, there’s a style to match any vision you have for your space. Let’s walk through some of the most popular options.
Solid Color Epoxy
Think of solid color epoxy as the clean, classic choice. This style provides a seamless, uniform color across your entire floor, creating a polished and professional look. It’s perfect if you want a simple, understated finish that’s still incredibly durable and easy to clean. You can choose from a wide range of colors, from traditional grays and tans that hide dirt well to bold colors that make a statement. Because of its clean aesthetic and tough-as-nails performance, solid color epoxy is a go-to for garages, basements, and commercial showrooms alike.
Metallic Epoxy
If you’re looking for a floor with serious “wow” factor, metallic epoxy is the answer. This style involves mixing shimmering, metallic pigments into the epoxy before it’s applied. As the epoxy flows and cures, the pigments swirl and settle, creating a stunning, three-dimensional effect that mimics the look of molten metal, flowing marble, or pearlescent clouds. No two metallic floors are exactly alike, so you get a completely unique, one-of-a-kind surface. It’s a luxurious option that can turn a standard garage or basement into a high-end, custom space.
Flake Epoxy
Flake epoxy floors offer a perfect blend of beauty and brawn. This style is created by broadcasting colorful vinyl flakes or chips onto a wet epoxy base coat, then sealing them in with a clear topcoat. The result is a vibrant, multi-hued surface with a subtle texture that adds visual interest and depth. These decorative flakes not only look great but also help hide minor imperfections in the concrete below. Plus, the textured finish provides more grip than a smooth surface, making it one of the most popular garage floor coatings for busy, high-traffic areas.
Clear Epoxy
Sometimes, the original concrete floor has its own unique character that you don’t want to cover up. That’s where clear epoxy comes in. A clear epoxy coating acts as a durable, protective sealer that enhances the natural look of the concrete underneath. It provides a high-gloss, “wet look” finish that deepens the color and highlights the texture of the concrete while protecting it from stains, dust, and abrasion. It’s also commonly used as a final topcoat over decorative flake or metallic systems to add an extra layer of protection and create a smooth, easy-to-clean surface.
Anti-Slip Finishes
Safety should always be a priority, especially in spaces like garages or workshops where spills are common. While a high-gloss epoxy floor can be slippery when wet, you can easily add an anti-slip finish. This is done by mixing a special aggregate, like silica sand or aluminum oxide, into the final topcoat. This additive creates a fine, gritty texture on the surface that provides excellent traction underfoot without significantly changing the floor’s appearance. It’s a simple but essential step for any area prone to moisture, ensuring your beautiful new floor is safe for everyone. Many professional services include this as a standard safety feature.
What Are the Benefits of an Epoxy Floor?
If you’re tired of looking at a stained, dusty, or cracked concrete garage floor, you’ve probably heard about epoxy coatings. This popular flooring solution isn’t just for commercial showrooms; it offers a long list of practical advantages that make it a fantastic choice for homeowners. An epoxy coating transforms your concrete from a purely functional slab into a durable, attractive, and valuable part of your home. It creates a seamless, resilient surface that protects the concrete below while making your entire garage feel cleaner and more finished. From its incredible strength to its polished look, let’s walk through the key benefits that make epoxy a go-to for garage floor transformations.
Durability and Impact Resistance
One of the biggest reasons people choose epoxy is its toughness. A professionally installed epoxy coating creates a hard, thick surface that is much stronger and more resilient than bare concrete. Think about everything your garage floor endures: dropped tools, rolling toolboxes, jack stands, and the weight of your vehicles. An epoxy floor can handle it all, resisting impacts, chipping, and abrasions that would easily damage regular concrete. This durability comes from the chemical bond between the resin and hardener, which cures into a solid, protective layer over your floor. This means your garage floor coating will not only look great but will also shield the concrete underneath from wear and tear for years to come.
Chemical and Stain Resistance
Garages are often ground zero for spills. Oil, gasoline, brake fluid, antifreeze, and road salts can all leak from your car and leave permanent stains on porous concrete. An epoxy floor creates a non-porous, high-gloss barrier that stops these chemicals in their tracks. Instead of soaking in and creating a permanent stain, spills sit on top of the surface, waiting to be wiped away easily with a simple cloth or paper towel. This makes cleanup incredibly simple and keeps your garage floor looking pristine. This resistance is a game-changer for anyone who enjoys working on their car or simply wants to maintain a clean, functional space without worrying about ugly, permanent marks.
Easy Maintenance
Bare concrete is a magnet for dust and dirt, which gets tracked into your home every time you walk through the garage. Because an epoxy floor is seamless and non-porous, it’s incredibly easy to keep clean. Dust, dirt, and debris can’t get trapped in pores or grout lines, so a quick sweep with a broom or dust mop is often all you need for daily upkeep. For a deeper clean, a simple mopping with a pH-neutral cleaner will do the trick. You can say goodbye to the endless fine concrete dust that seems to cover everything. This low-maintenance quality saves you time and effort, making it easier than ever to keep your garage looking its best.
Design Versatility and Customization
Your garage doesn’t have to be a boring, gray box. Epoxy flooring gives you the chance to customize the look of your space to match your personal style. While solid colors like gray and tan are classic choices, you can also choose from a wide spectrum of colors. Decorative flakes can be broadcast into the coating to create a textured, granite-like appearance that also helps hide minor imperfections and dirt. For a truly unique look, metallic pigments can be added to create a stunning, three-dimensional, or marbled effect. Beyond aesthetics, you can add anti-slip additives to the topcoat for extra traction and safety. This versatility allows you to create a floor that is not only functional but also a beautiful extension of your home’s design.
How Much Does Epoxy Flooring Cost?
Figuring out the budget for your new garage floor is a big step. The cost of epoxy flooring isn’t a single number; it’s a range that depends on whether you tackle it yourself or hire a pro, the size of your space, and the quality of the materials you choose. Let’s break down the numbers so you can get a clearer picture of the investment required.
What Affects the Price?
The final price tag for an epoxy floor is influenced by a few key factors. First, the size of your garage is the most obvious one; more square footage requires more product. Second, the type and quality of the epoxy kit you choose will cause prices to vary widely. Some kits include just the basics, while others come with primers, topcoats, and decorative flakes. The condition of your existing concrete also plays a role. If your floor has a lot of cracks, stains, or an old coating that needs to be removed, you’ll need to budget for extra materials and prep time.
DIY vs. Professional Installation Costs
If you’re going the DIY route, you can find epoxy kits ranging from around $150 to over $2,500, depending on the brand’s quality and the kit’s size. While the lower end of that range seems appealing, remember that a cheaper kit might not provide the durable, long-lasting finish you’re hoping for. In contrast, a professional installation costs more upfront but includes expert surface preparation, high-quality materials, and a guarantee on the work. This approach saves you time and ensures your garage floor coating is done right the first time, avoiding costly mistakes.
Watch Out for Hidden Costs
The price on the DIY kit box is rarely the total amount you’ll spend. Be prepared for potential hidden costs that can pop up during the project. For example, if your concrete floor has an old layer of paint or sealant, you’ll need to buy strippers and tools to remove it completely. You’ll also need to purchase filler for any cracks or pits in the concrete. Many floors, especially older or more porous ones, require a separate primer to ensure the epoxy adheres properly, which is often an additional expense. These extra steps and materials are essential for a good result, but they can add up.
A Step-by-Step Guide to DIY Epoxy Flooring
Alright, if you’ve decided to take on an epoxy floor project yourself, I’m here to walk you through it. Think of this as your friendly guide to getting the job done right. The key to success with DIY epoxy is all in the preparation. Rushing any of the early steps is the fastest way to a floor that peels, bubbles, or just doesn’t last. It’s a project that demands patience and attention to detail, but a great-looking floor is achievable. Let’s break down the process into manageable steps so you know exactly what to expect.
Step 1: Test for Moisture and Assess Your Concrete
Before you even think about opening a can of epoxy, you need to play detective with your concrete. Moisture is the number one enemy of an epoxy coating. If there’s too much moisture vapor coming up through the concrete slab, it will get trapped under the epoxy and cause it to bubble and peel off later. To test for it, you can do a simple plastic sheet test. Just tape a 2×2 foot square of plastic sheeting to the floor, sealing all four sides with painter’s tape. Wait 24 hours. If you see condensation under the plastic or the concrete looks dark, you have a moisture issue that needs to be addressed before you can proceed.
Step 2: Clean, Degrease, and Repair the Surface
Your concrete floor needs to be spotlessly clean for the epoxy to bond. Start by clearing everything out of the garage and giving the floor a thorough sweep and vacuum. Next, you’ll need to tackle any oil stains or grease spots. A good quality concrete degreaser is your best friend here. Follow the product instructions, scrub hard, and rinse well. Once the floor is clean and dry, inspect it for any cracks or pits. You’ll want to fill these with an epoxy crack filler or concrete patch compound. A smooth, clean canvas is essential for a professional-looking finish, so don’t cut corners on this step.
Step 3: Prep the Concrete by Etching or Grinding
This is arguably the most important step for ensuring your epoxy floor lasts. The goal is to create a rough, porous surface that the epoxy can grip onto, much like how paint needs a primer. Most DIY kits come with an acid etching solution. This involves pouring a mix of acid and water on the floor to open up the concrete’s pores. However, the method professionals use is mechanical grinding. Grinding the concrete with a diamond-tooled machine is far more effective at creating the ideal surface profile for adhesion. Failing to properly prep the surface is a guaranteed way to have your coating fail down the road.
Step 4: Mix and Apply the Base Coat
Now for the main event. Your epoxy will come in two parts: a resin and a hardener. It is absolutely critical that you mix them according to the manufacturer’s instructions. Use a paddle mixer attached to a drill for the best results, and be sure to scrape the sides and bottom of the bucket as you mix to ensure everything is incorporated. Pay close attention to the “pot life,” which is the amount of time you have to work with the epoxy before it starts to harden in the bucket. Once it’s mixed, start cutting in the edges with a brush and then use a roller with a 3/8-inch nap to apply a thin, even coat to the rest of the floor.
Step 5: Add Flakes or Pigments (Optional)
If you’re going for a decorative look, this is where the magic happens. While the base coat is still wet, you can broadcast decorative vinyl flakes across the surface. The key to a natural, even look is to toss the flakes up into the air and let them fall gently onto the floor, rather than throwing them straight down. You can go for a light sprinkle or full coverage where the flakes completely cover the base color. It’s a good idea to wear spiked shoes so you can walk on the wet epoxy without leaving footprints. This step adds texture and personality, turning a plain floor into a custom design.
Step 6: Apply the Topcoat and Let It Cure
After the base coat and flakes have had time to cure (check the product instructions, usually 12-24 hours), it’s time for the final layer. First, you’ll need to scrape off any loose, vertical flakes with a metal scraper and then vacuum up all the debris. Now, you can apply the clear topcoat. This protective layer is what gives the floor its gloss and durability, shielding it from scratches, chemicals, and UV damage. Many professionals use a polyaspartic coating as a topcoat because it’s more durable and won’t yellow over time. Once applied, you have to let it cure completely, which can take up to a week before you can park a car on it. Patience is key.
Common DIY Epoxy Flooring Mistakes
The allure of a weekend DIY project is strong, and an epoxy floor seems straightforward enough. But this is one project where small mistakes can lead to big, costly problems. Unlike painting a wall, where you can easily paint over a mistake, a failed epoxy floor often means starting from scratch by grinding everything off. To help you avoid a flooring disaster, let’s walk through the most common mistakes people make when trying to install their own epoxy floor.
Rushing Your Surface Prep
Think of surface preparation as the foundation of your entire floor. If it’s weak, everything you put on top will eventually fail. Many DIY kits downplay this step, but it’s the most critical part of the process. Your concrete must be perfectly clean, free of oils, and fully repaired before you even think about mixing the epoxy. Any cracks or pits need to be filled. More importantly, the concrete needs to be profiled, which means making it slightly rough through grinding or acid etching. This gives the epoxy a textured surface to grip onto, creating a permanent bond. Skipping or rushing this step is the number one reason epoxy floors peel and flake away.
Ignoring Moisture Issues
Concrete might look and feel solid, but it’s a porous material that can hold and release moisture. If there’s too much moisture vapor pushing up through your concrete slab, it will get trapped under the non-breathable epoxy coating. This pressure builds up and eventually causes the epoxy to bubble, blister, or peel right off the floor. You can do a simple test by taping a plastic sheet to the floor for 24 hours to see if condensation forms. However, professionals use specialized meters for an accurate reading. Ignoring a potential moisture problem is a gamble that can ruin your entire project and leave you with a mess.
Mixing or Applying It Wrong
Epoxy isn’t paint; it’s a two-part chemical product that hardens through a specific reaction. DIY kits require you to mix Part A (the resin) and Part B (the hardener) in precise ratios. If you eyeball the measurements or don’t mix them for the recommended amount of time, the epoxy may never cure properly, leaving you with a sticky, soft floor. Once mixed, the clock starts ticking. You have a limited “pot life,” usually 30 to 45 minutes, to apply the entire batch before it starts to harden in the bucket. Rushing the application can lead to an uneven finish, while working too slowly means wasting expensive material.
Working in the Wrong Conditions
The temperature and humidity of your garage play a huge role in how your epoxy floor cures. Most kits recommend applying the coating when the temperature is between 50 and 90 degrees Fahrenheit. If it’s too cold, the chemical reaction will slow down or stop, preventing the floor from hardening correctly. If it’s too hot or humid, the epoxy can cure too quickly, making it difficult to apply smoothly and potentially causing bubbles or other defects. You need to maintain these ideal conditions for the entire curing period, which can be up to 72 hours, making this a tricky variable to control.
Using a Low-Quality Kit
When it comes to epoxy, you absolutely get what you pay for. The inexpensive, all-in-one kits you find at big-box stores are tempting, but they often contain lower-quality, water-based epoxy that is much thinner than professional-grade products. These kits create a finish that looks more like a layer of paint than a thick, durable coating. While it might look good at first, it’s far more likely to scratch, stain, and peel under the stress of hot tires and daily use. Professionals use 100% solids epoxy or advanced polyaspartic garage floor coatings that create a much thicker, more resilient surface designed to last for years.
How to Maintain Your Epoxy Floor
One of the best things about an epoxy floor is how simple it is to care for. With a little routine attention, your garage floor will keep its shine and durability for years. Forget about the intensive scrubbing that bare concrete requires. Maintaining your new floor is all about gentle, consistent cleaning and a few preventative measures to protect your investment.
Simple Cleaning Tips
Keeping your epoxy floor looking brand new is surprisingly easy. For daily dust and debris, a quick pass with a soft-bristle broom or a dust mop is all you need. When it’s time for a more thorough cleaning, use a pH-neutral cleaner mixed with water and a soft mop. Avoid using acidic or soap-based cleaners, as they can leave a hazy film or dull the glossy finish over time. Spills are also no cause for panic. Just wipe up any leaked oil, chemicals, or other liquids as soon as you notice them to prevent any potential staining on your beautiful garage floor coating.
How to Prevent Wear and Tear
While epoxy is incredibly tough, a few simple habits can prevent unnecessary wear and tear. Place walk-off mats at any entry doors leading into your garage to catch the dirt, sand, and grit that can act like sandpaper on the floor’s surface. It’s also a good idea to use protective pads or coasters under heavy items like rolling toolboxes, jacks, and motorcycle kickstands to distribute the weight and prevent scratches. Getting organized with proper garage storage solutions not only clears up floor space but also reduces the chances of heavy items being dragged across the finish.
Handling Temperature, Humidity, and Heavy Loads
A professionally installed epoxy or polyaspartic floor is designed to handle the demands of a busy garage. It can easily withstand the weight of vehicles, and high-quality coatings are formulated to resist issues like “hot-tire pickup,” where hot tires can soften and lift lesser-quality sealers. The floor is built to be resilient against temperature fluctuations and humidity. While the surface is impact-resistant, try to avoid dropping sharp or heavy tools from a significant height, as a forceful impact could potentially chip the coating. For the most part, you can use your garage without worrying about damaging the floor.
Knowing When to Reapply a Topcoat
Think of the topcoat as a sacrificial layer that protects the decorative base coat of your floor. Over many years of use, this topcoat can begin to show signs of wear, especially in high-traffic lanes. You’ll know it might be time for a refresh when the floor starts to look a little dull, minor scratches become more apparent, or it doesn’t clean up as easily as it used to. Depending on your usage, a new topcoat might be needed every five to ten years to restore that original gloss and protection. This simple maintenance step keeps your floor looking its best and extends its life, reinforcing the value of professional garage services.
Is a Professional Installation Worth It?
After learning about all the steps and potential pitfalls, you might be asking yourself if a DIY epoxy floor is the right move. While tackling a home project yourself can be satisfying, floor coatings are one area where professional expertise makes a world of difference. Many DIY attempts run into trouble because of incorrect application or a poorly prepped surface, leading to a finish that peels, bubbles, or just doesn’t last.
The truth is, most DIY epoxy kits sold in big-box stores can’t compare to professional-grade materials. These kits often contain lower-quality epoxy that is less durable and more prone to failure. A professional installer not only has the right tools and experience for flawless surface preparation but also has access to superior products that deliver a long-lasting, showroom-quality finish. When you invest in a professional installation, you’re paying for peace of mind and a floor that is built to withstand the test of time.
Why Polyaspartic Is a Better Choice Than DIY Epoxy
When you work with a professional, you also get access to better materials, like polyaspartic coatings. The epoxy found in most DIY kits simply can’t match the performance of a professionally installed polyaspartic floor. These advanced coatings offer superior durability, flexibility, and resistance to UV rays, meaning your floor won’t yellow over time.
DIY kits can lead to disappointment because they lack the strength and polished finish of a professional job. A polyaspartic garage floor coating is a more reliable choice because the material itself is more robust, and it’s applied by a trained technician who knows how to get the best results. It cures faster, creates a stronger bond with the concrete, and provides a tougher surface that stands up to daily life.
The Garage Kings Professional Solution
Hiring a professional team like Garage Kings helps you avoid all the common DIY mistakes, from improper surface prep to messy application. We handle every step of the process to ensure a perfect, durable finish that dramatically improves your space. With proper installation and minimal upkeep, a professionally coated floor can look great for more than 20 years.
Choosing a professional installation is an investment in your home’s value and your own peace of mind. You get a beautiful, high-performance floor without the stress and uncertainty of a DIY project. Our teams across our many locations are experts in transforming concrete surfaces. We guarantee a result that is not only beautiful but also incredibly durable, giving you a garage floor you can be proud of for decades.
Frequently Asked Questions
My concrete has cracks and stains. Can I still get an epoxy floor? Yes, you absolutely can. In fact, covering imperfect concrete is one of the best uses for an epoxy coating. A professional installation always begins with repairing the existing surface. This involves filling in cracks and pits and grinding the floor to remove old stains and create a smooth, uniform canvas. This preparation step is critical, as it ensures the final coating looks flawless and bonds correctly to the concrete for a long-lasting finish.
What’s the real difference between epoxy and a polyaspartic coating? Think of polyaspartic as the modern, upgraded version of epoxy. While they are chemically related, polyaspartic coatings are more flexible, more durable, and cure much faster. A huge advantage is that they are UV stable, which means they won’t turn yellow or fade from sun exposure, making them ideal for garages with windows or even outdoor patios. Professionals often prefer polyaspartic systems because they provide a tougher, longer-lasting result for homeowners.
Is an epoxy floor slippery, especially when it gets wet? A high-gloss epoxy floor can be slippery when wet, similar to any smooth, non-porous surface. However, this is a very common and easily solved concern. During installation, a special anti-slip aggregate can be mixed into the final topcoat. This creates a subtle texture that provides excellent grip underfoot without taking away from the floor’s appearance. It’s a simple addition that makes your beautiful new floor safe for the whole family.
How long will my new floor last, and is it hard to take care of? A professionally installed, high-quality floor coating is a long-term investment that can look great for 20 years or more. The key to its longevity is how simple it is to maintain. Daily cleaning is as easy as using a dust mop or soft broom. For a deeper clean, you just need a pH-neutral cleaner and water. Because the surface is non-porous, spills like oil or other fluids wipe right up without staining, making it one of the lowest-maintenance flooring options available.
Why do so many DIY epoxy floors fail? The most common reason DIY projects fail is improper surface preparation. The inexpensive kits from hardware stores often can’t create a strong, permanent bond because the prep steps are rushed or the materials are not strong enough. Things like hidden moisture in the concrete, incorrect mixing ratios, or applying the coating in the wrong temperature can all lead to a floor that peels, bubbles, or never cures correctly. A professional handles all these variables to guarantee a durable result.